HOW TO MAKE A PENCIL STORAGE UNIT
I recently created my own pencil storage unit, using a DVD cabinet and some empty DVD cases. It didn’t take too long to build, and cost me less than £20. I’ve just started studying from the book, lifelike drawing in colored pencil by Lee Hammond. As I opened my tin of Prismacolor pencils, it became apparent that I needed somewhere to store all my pencils. There are loads of them! Those tins are like the Doctor’s Tardis lol
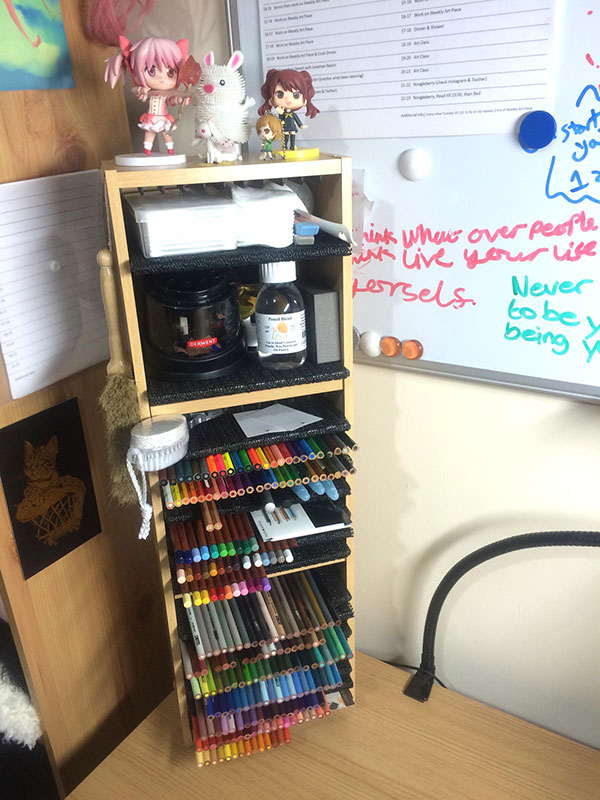
I needed to store them safely, securely while still having them be viewable and easily accessible on my desk. This unit fits the bills beautifully, the most awesome thing is, it doesn’t take up that much space on your desk, seeing as the unit is standing upright, but if you wanted you could actually lay it on it’s side, or even hang it on your wall.
I searched high and low, it was getting a bit annoying actually as it was distracting me from studying. I kept thinking, “How am I going to store all these bleeding pencils?” In the end, I couldn’t find nothing, I bought a rotating carousel thing and it was cool, but it just didn’t feel right. So I decided it was time to make one myself, and so here is a guide on how you can create your very own Pencil Storage Unit, ideal for coloured pencils and accessories.
I’ll list all the things you’ll need to make this, with links where appropriate, and offer a simple guide, together with little hints I learnt during my process of making it, so yours doesn’t collapse in like mine did lol
COST AND WHAT YOU’LL NEED
ARGOS 33 DVD Media Storage Unit – £10.19 (Argos code 903/6240)
Empty slimline DVD cases – £3 (Poundshop sell them in packs of 7, I needed 16 cases, so 3 packs)
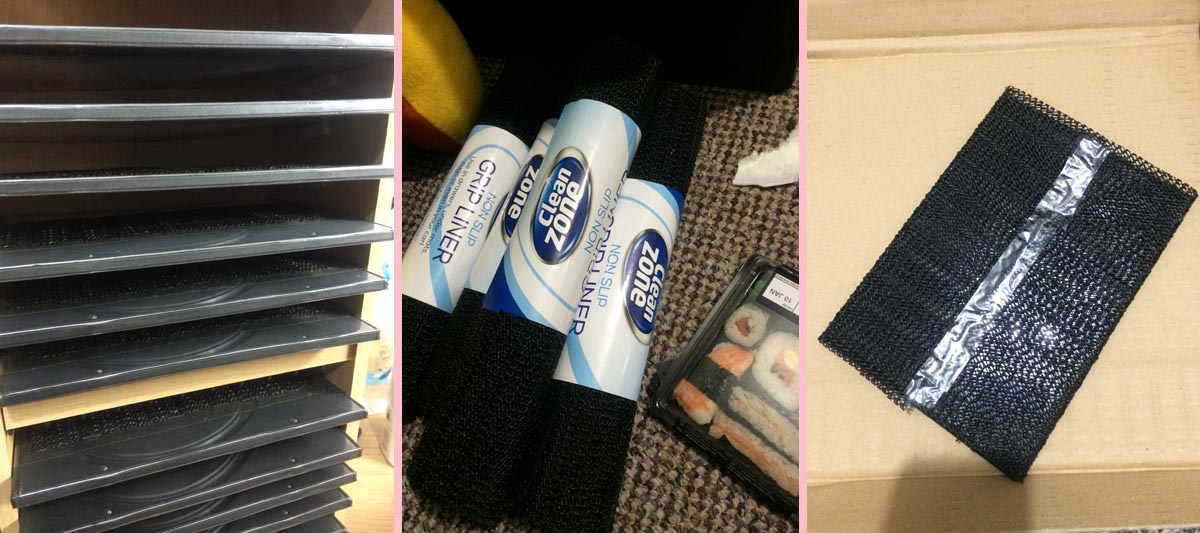
Non Slip Grip Liners – £3 (Poundshop sell them in rolls of 150x30cm, and 1 roll covers 7 DVDs, so 3 rolls were needed)
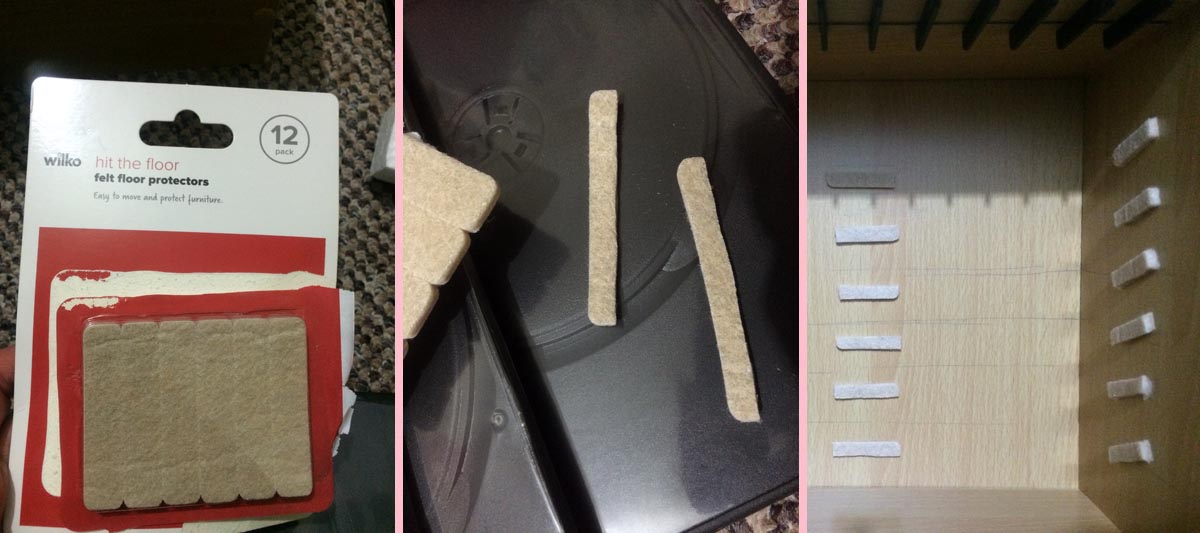
Felt Floor Protectors – 99p (Wilkos, pack of 12 does 16 shelves)
Super Glue – £1 (Poundshop)
Screwdriver Bit of String
TOTAL COST £18.18
Approximate time to make it depends on how OCD you get when placing your selves, but I would say about 2-4 hours.
STEP ONE
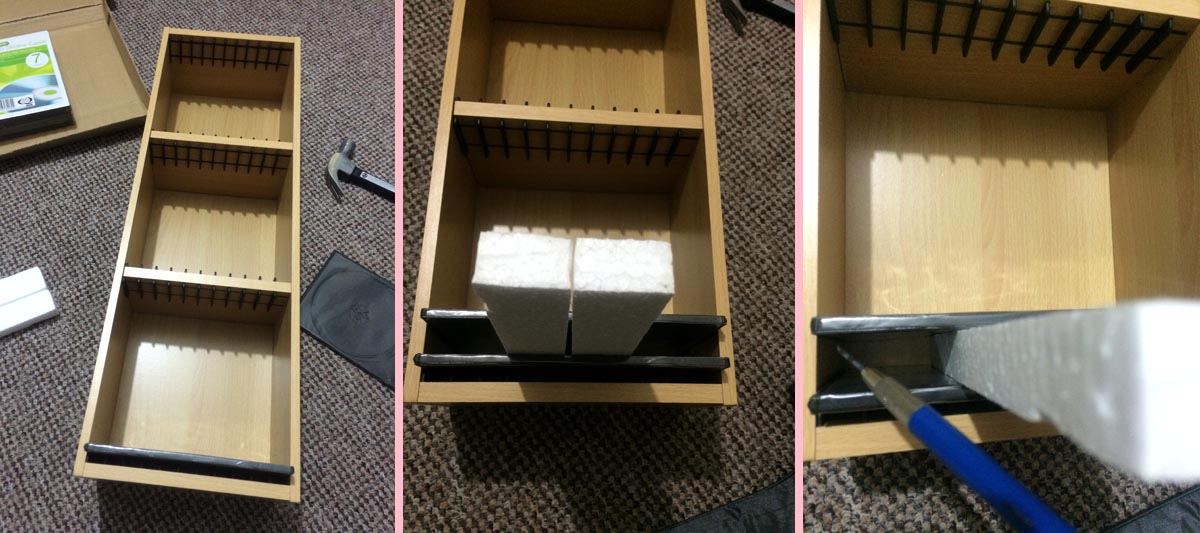
It all starts with your DVD unit, follow the instructions provided with your unit to build it, then, using bits of the styrofoam blocks from the packaging (or a ruler) and 2 DVD cases, work your way up to the top equally spacing out the shelves. I suggest using a clutch pencil to do this, so that you can reach the back of the unit without nudging the DVD cases!
STEP TWO
How to Make your own Pencil Storage Unit, by Artist Sophie Lawson
I then got my felt floor protectors, cut them into 4 long rectangles, and stuck them to the unit, one at the back middle, one front left and one front right
(Don’t use glue at this stage, as you’ll probably want to keep moving things
around until the shelves are where you want them).
At first I stuck them all down 100% parallel with the top and bottom of the unit, but when I put all the DVD cases in with pencils on to test it, I felt like the angles weren’t right, and after a bit of trial and error, decided to actually tilt them a tiny bit backwards, this allows for the pencils to sit on the DVD cases more comfortably. Once you have the DVD cases were you want them, peel back the felt floor protectors and super glue them in place. If you don’t glue them, they will slowly slip down under the wait of the shelves. I found this out when I woke up the next day and all my shelves and pencils had slid down and were on top of each other at the bottom of the unit lol So you will need to super glue them!
STEP THREE
You could do this step right at the start, it may actually be better to do that but I didn’t do it until after I had all the DVD cases in place. Having got all your felt floor protectors super glued in place, take your grip liners and cut them up into widths of a DVD case. 1 roll from the poundshop (150x30cm) can cover 7 DVD cases, once you’ve cut up enough, simply cover each DVD case and sellotape it in place, overlapping the edge slightly so that nothing dangles down. The sellotaped side goes underneath so that the top of the shelf is all grippy…I’ll now refer to the DVD cases as shelves :)
STEP FOUR
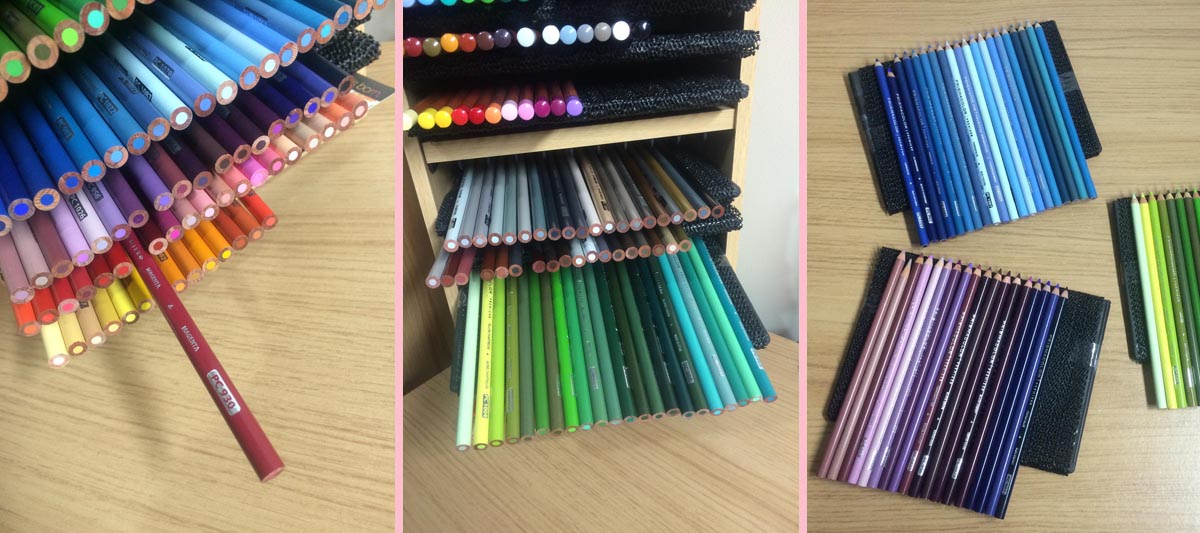
This grip liner is a really good way to stop the pencils sliding about, meaning you’re able to
– pull a pencil out, to look at the information on its side
– pull a shelf halfway out to more clearly see all the pencils on that shelf
– or even pull a shelf completely out of the unit, so you can place all those pencils on your desk safe and securely
It also future-proofs the shelf for when you’ve sharpened your pencils into little tiny stumps lol, you’ll be able to place them on the end of the shelf without them sliding down to the back, plus it makes the shelves look nice :)
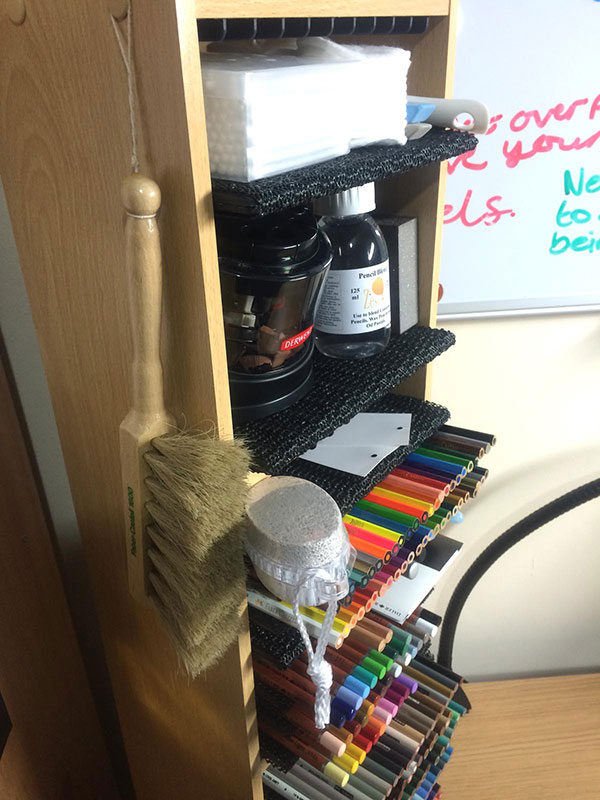
Finally, I turned the top section of the unit into storage for my Derwent battery operated sharpener, erasers and Zest It blending tools. I also slightly undid one of the screws, tied a bit of string around it and then screwed it back in so that I could hang my Dusting brush in place. That’s pretty much it, now all you have to do is arrange all your pencils on the shelves in colour order lol